How to Sterilize Jars Properly: A Beginner's Guide
Ob du Marmelade zubereitest, Gemüse einlegst oder einfach nur Lebensmittel länger frisch halten möchtest, das Sterilisieren von Gläsern ist ein wichtiger Schritt. In diesem Beitrag zeigen wir dir, wie du deine Gläser mit einfachen Schritten richtig sterilisieren kannst, um sicherzustellen, dass deine Lebensmittel hygienisch und haltbar bleiben.


Warum ist das Sterilisieren von Gläsern wichtig?
Bevor wir in die Details eintauchen, lass uns einen Moment über die Bedeutung des Sterilisierens von Gläsern sprechen. Das Sterilisieren eliminiert Keime, Bakterien und Mikroorganismen, die die Haltbarkeit und Frische deiner Lebensmittel beeinträchtigen könnten. Es ist entscheidend, um sicherzustellen, dass deine hausgemachten Leckereien sicher gegessen werden können.
Die richtigen Werkzeuge und Zutaten bereitstellen
Bevor du mit dem Sterilisieren beginnst, ist es wichtig, alle notwendigen Werkzeuge und Zutaten bereitzustellen. Du benötigst saubere Gläser, einen großen Topf, Wasser, optional Essig und einen Timer. Stelle sicher, dass deine Gläser frei von Rissen oder Abplatzungen sind, um eine optimale Sterilisation zu gewährleisten.


Schritt-für-Schritt-Anleitung zum Sterilisieren von Gläsern
Schritt 1: Gläser gründlich reinigen
Bevor du mit dem Sterilisieren beginnst, reinige deine Lieblingsgläser gründlich mit warmem Wasser und Spülmittel oder einfach in der Spülmaschine. Achte darauf, auch die Deckel und Dichtungen zu reinigen, um alle Rückstände zu entfernen.
Schritt 2: Wasser vorbereiten
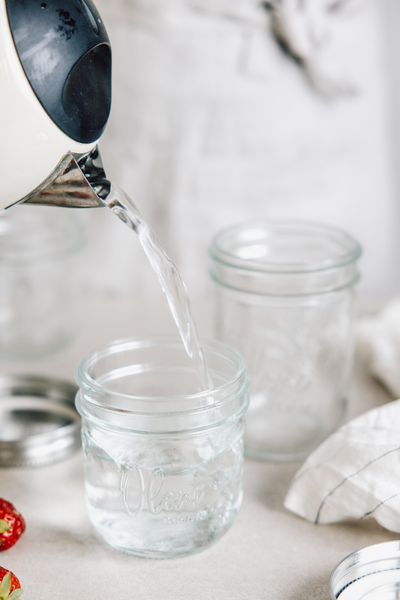
Fülle einen großen Topf mit ausreichend Wasser, um die Gläser vollständig zu bedecken. Füge optional einen Esslöffel Essig pro Liter Wasser hinzu. Der Essig hilft, Kalkablagerungen zu verhindern und die Gläser makellos zu sterilisieren.
Schritt 3: Gläser ins Wasser setzen
Platziere die gereinigten Gläser vorsichtig in den Topf mit Wasser und sorge dafür, dass sie vollständig untergetaucht sind. Vermeide Überfüllung, damit jedes Glas ausreichend Platz hat, um effektiv sterilisiert zu werden.
Schritt 4: Wasser zum Kochen bringen
Bringe das Wasser zum Kochen und lasse die Gläser dann für 10 Minuten sanft kochen. Der Dampf wird dazu beitragen, alle Keime zu beseitigen und die Gläser zu sterilisieren.
Schritt 5: Gläser trocknen lassen
Nach dem Kochen entferne die Gläser vorsichtig mit einer Zange und lasse sie auf einem sauberen Handtuch oder einem bereitgestellten Gitter trocknen. Vermeide es, die Gläser abzutrocknen, da dies zu Verunreinigungen führen könnte.
Schritt 6: Trocknen und Lagern
Sobald die Gläser trocken sind, kannst du sie mit deinen bevorzugten Lebensmitteln füllen und verschließen. Stelle sicher, dass die Deckel fest sitzen, um die Frische zu bewahren. Lagere die Gläser an einem kühlen, trockenen Ort, um optimale Bedingungen zu gewährleisten.
Alternativen zum Sterilisieren im Wasserbad:
-
Gläser in der Mikrowelle sterilisieren: Stelle die sauberen Gläser in die Mikrowelle und erhitze sie bei hoher Leistung für 1-2 Minuten. Achte darauf, dass die Gläser nicht überhitzen und lass sie anschließend abkühlen, bevor du sie füllst.
-
Gläser im Backofen sterilisieren: Platzieren Sie die sauberen Gläser und Deckel auf einem Backblech und backen Sie sie bei 120°C für etwa 10 Minuten. Entfernen Sie sie vorsichtig und lassen Sie sie abkühlen, bevor Sie sie verwenden.
-
Gläser in der Spülmaschine sterilisieren: Einige moderne Spülmaschinen verfügen über ein Sterilisierungsprogramm, das auch für das Sterilisieren von Gläsern verwendet werden kann. Platziere die Gläser und Deckel in der Spülmaschine und verwende das entsprechende Programm für eine gründliche Sterilisation.


Tipps für ein erfolgreiches Sterilisieren
Damit dein Sterilisationsprozess reibungslos verläuft, sind hier einige zusätzliche Tipps:
- Verwende frische Zutaten: Frische Lebensmittel tragen dazu bei, eine längere Haltbarkeit zu gewährleisten.
- Überprüfe die Gläser auf Risse: Beschädigte Gläser können nicht effektiv sterilisiert werden, also achte darauf, dass sie in einwandfreiem Zustand sind.
- Halte die Utensilien sauber: Sowohl die Zangen als auch der Topf sollten vor jedem Gebrauch gründlich gereinigt werden, um Verunreinigungen zu vermeiden.
Wir hoffen, dass dieser Leitfaden dir geholfen hat, das Sterilisieren von Gläsern problemlos zu meistern.


